If you want to start accepting commissions through PayPal for your art business, probably you'll need to start a blog or at least a single-page website that will take your customers and act as a Payment gateway.
This is a complete guide to setting up a commission page for any kind of business using PayPal for free. We will be covering all the below steps:
- Creating PayPal account
- Setting up a Blog/website
- Integrating both platforms
Before getting started, we'll need some fundamental understanding of HTML, CSS, JS, and some common sense to edit the Commission page.
How to set up a commission page using Paypal?
To set up a commission page, we must create a blog or website first. Then, we'll create a PayPal(Personal or Business) account.
After that, we've to set up a PayPal accept Button/Link on that page. So, let's get started with blog creation first.
I. Create a Blog/Website
There are so many platforms available like Blogger, WordPress, Woocommerce, WIX, etc. to create a blog or website.
If you're a beginner and don't want much income from your business, you can go for Blogger.
You don't need to pay for anything. It's a completely free platform.
Here, I'm using Blogger for a demonstration, coz it's free for a lifetime. You can use any other platform of your choice.
1. Visit blogger.com and log in with your Google account
2. After the sign-up process, you'll see the new blog creation window
3. Put the Blog name & URL name as per your choice and proceed
4. Now, you'll see the Blogger Dashboard
5. You can either create a post or page as a Commission page
Once, we've completed the commission page platform setup, we'll move to paypal account creation and integration with the Blog page.
II. Create PayPal Account
After the blog setup, the next step is creating a PayPal account. You can either create a personal account or a business account. Both just work best for small content creators.
But, if you're planning to grow your business in the future, a business account will be the best choice for you.
Please refer to this guide - Set up a PayPal business account for artists to accept art commissions!
III. Integrate PayPal into a Blog commissions page
We'll need a robust and working payment system for our business. So, we can use different paypal tools like Checkout, Subscription(for recurring monthly payments), QR codes and buttons, etc.
You can also use PayPal API to integrate the Paypal payment system into your entire website and create a Paypal payment ecosystem.
Here, we'll see the Basic Customised PayPal Integration with Blogger.
In the first step, we created a blog. Now we've to get the PayPal payment acceptance link created to put in our commissions page.
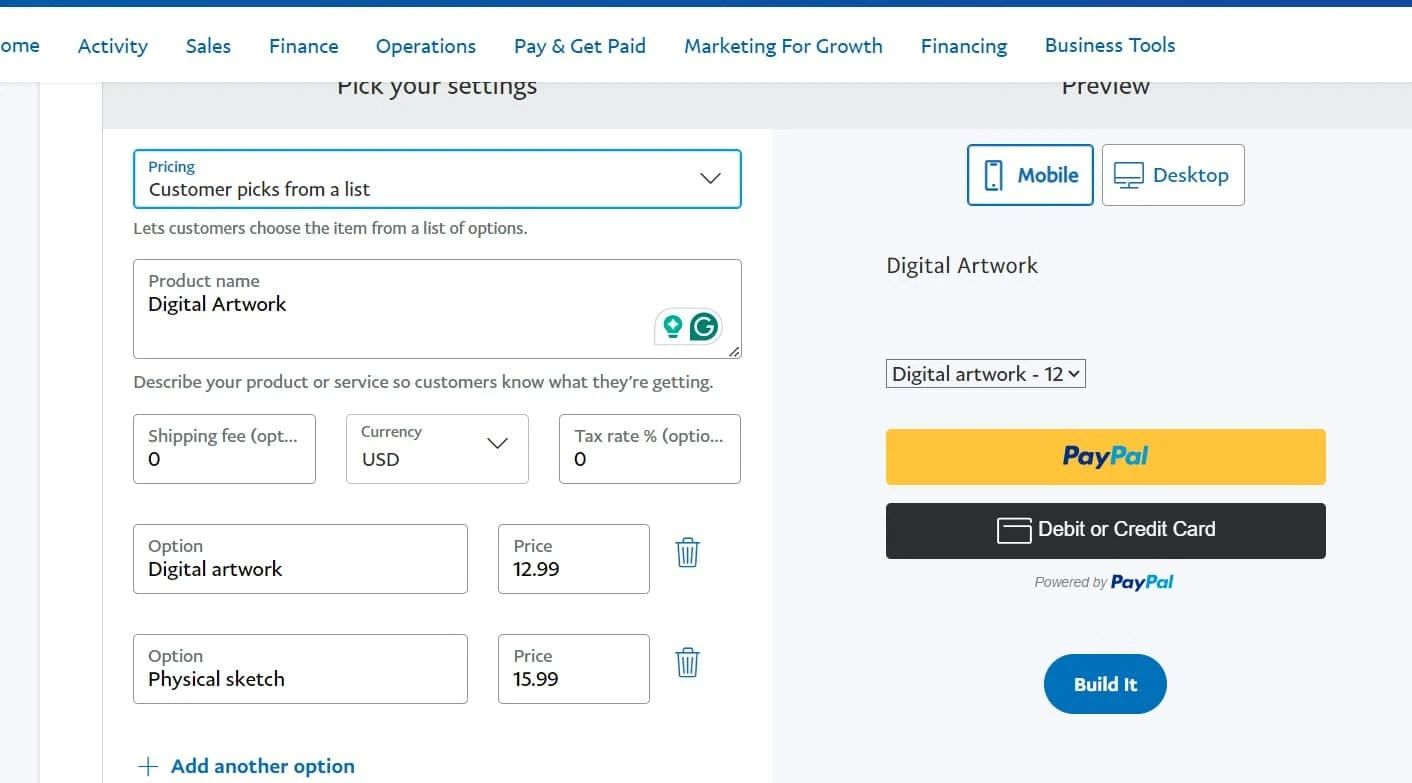
1. Visit the PayPal business account dashboard and follow this path - Pay & Get Paid > Pay Links and Buttons under Accept Payments
2. Now, select the appropriate option under Pricing - One set price, Customer picks from the list or Customer sets a price
3. Put other details like Product name, shopping fee, currency, etc., and select Build it
4. Copy the Payment link and note it somewhere for future use
Now, we'll integrate the copied link into our Commision page. We'll do some HTML and CSS coding.
If you have HTML knowledge, then you may find it easy to integrate. Otherwise, just follow the steps carefully.
Add the Link to the Blogger page
1. Create a new post or page
2. Select the pic upload and load the artwork picture you want to sell
3. Open the picture in a new tab and copy the URL of that pic
4. Now, toggle the code editor option in the top left and select the HTML View
5. Then, paste the below code in the editor and replace the highlighted part sample.jpg with the image pic URL & paypal URL with your PayPal Payment accept link
6. Also replace the 'Add your description here' text with your artwork description
<div style="font-family: helvetica; text-align: center;"><div class="container"><div class="separator" style="clear: both;"><img border="0" data-original-height="4267" data-original-width="4267" height="320" src="sample.jpg" width="320" />
</div><br />
<description>Add your description here</description>
<br /><br />
<a class="btn btn-warning" href="https://www.sandbox.paypal.com/ncp/payment/ALZADBJ7HEY8A" role="button" style="color: white;">Buy with <b>PayPal</b></a><br />
</div>
</div>
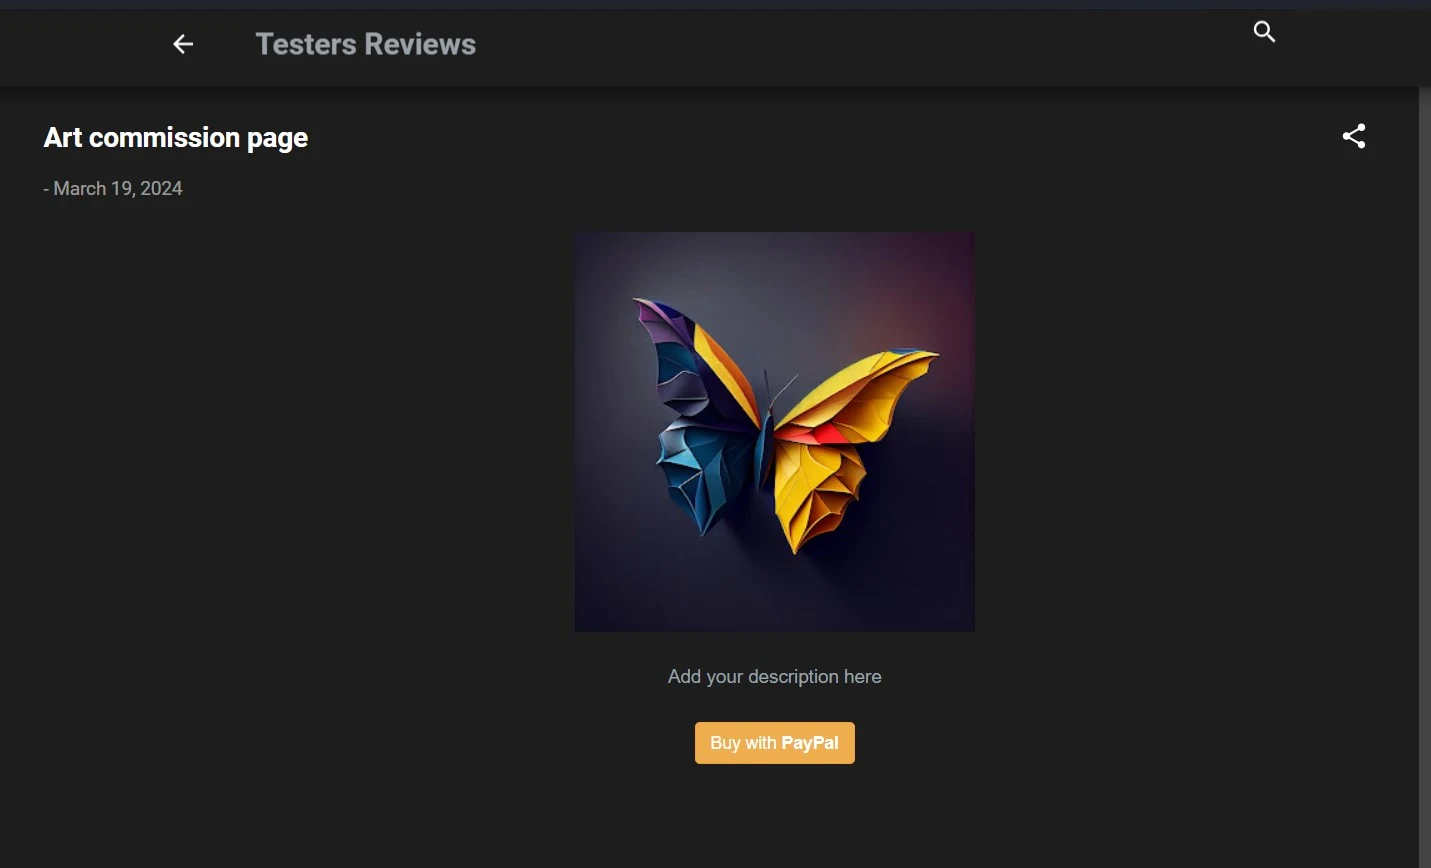
7. The end result should look similar to the below picture
If you've only a single artwork as a product or artist service to sell, then no need to set up a dedicated commission page.
Just share the payment acceptance link after the art piece delivery.
In the summary...
This guide outlines a step-by-step process to set up a commissions page using a PayPal business account. It not only applies to the artwork business but to others too who want to accept the commission on their service or product.
It's completely free, not blogger.com nor paypal will charge a single penny to you.
You'll only get charged when someone pays you using Paypal to your PayPal business account. That too will be between 2-4% of the total payment.
If you have any queries, or questions or want to add something to an existing post, please drop a comment.
We read all the comments. We'll try to resolve your problems!


